|
Today's post about tagging your Jersey calf is the third post in a series that I am writing about tattooing, tagging, and registering your calf with Jersey Canada.
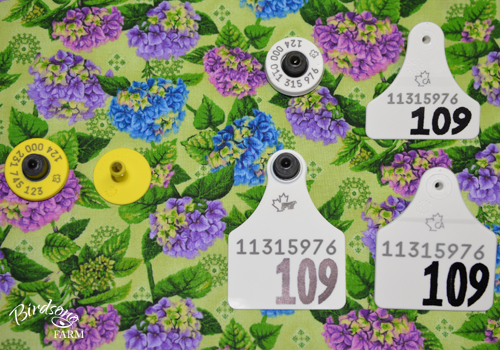
You are required to tattoo or tag your calf before registering her with Jersey Canada. I tattoo and tag, but both are not required and many dairy farmers choose to tag but not tattoo. I choose to tattoo because tags can get lost, plus it's a lot harder to tamper with a tattoo than with a tag. I tag my calves because in Canada you are required to tag all cattle before they leave the farm where they were born, which is known as the farm of origin. I tag my calves about two weeks after tattooing, when they are about a month old. There are two types of tags for cattle: the yellow CCIA (Canadian Cattle Identification Agency) tags which are reserved for tagging beef cattle, and the white NLID (National Livestock Identification for Dairy) tags which are reserved for tagging dairy cattle. The breeds that you tag with the white NLID tags are the Ayshire, Brown Swiss, Canadienne, Guernsey, Holstein, Jersey, Milking Shorthorn, and Norwegian Red breeds; dairy calves that are being raised for beef can be tagged with the white NLID tags, or the yellow CCIA tags.
Purchase your tagging kit
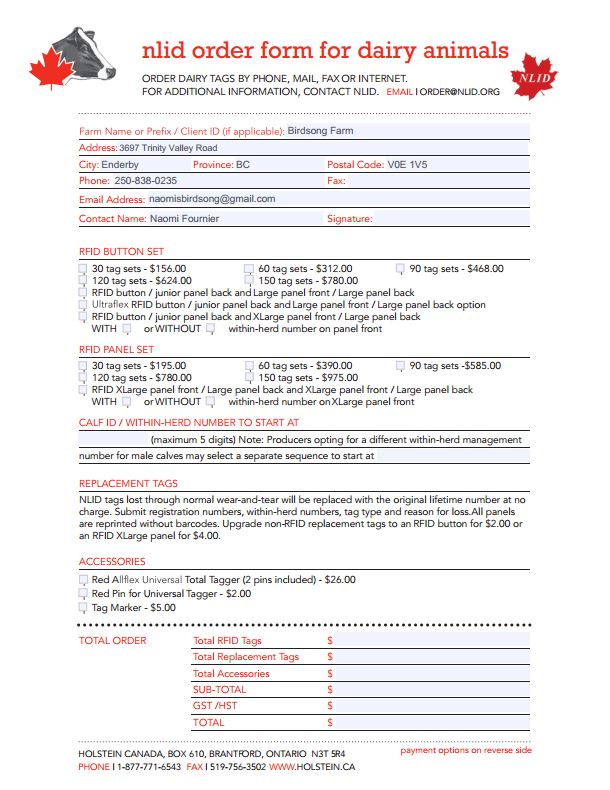
Before you tag, you will want to order your tagging pliers and a package of NLID tags. Holstein Canada administers the NLID program, and you can order everything you require by clicking here. Start out by filling out the order form with your farm name or prefix (my farm name is Birdsong Farm; my prefix, which I've registered with Jersey Canada, is Birdsong), or with your client identification if you've created an account with Holstein Canada.
Tags First, choose how many tag sets you wish to buy: 30, 60, 90, 120, or 150 tag sets. I purchased a 30 tag set in 2011, and I've tagged six calves in the past three years. I'm guessing that the remaining 24 tags will keeping me going for another twelve years!
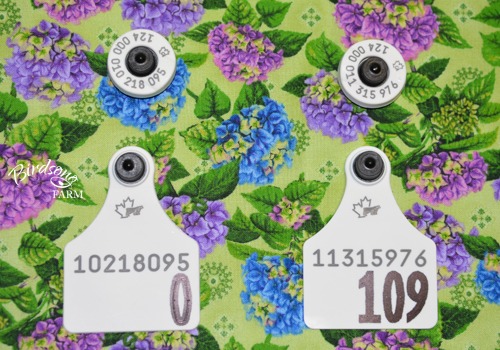
Next, choose which of the four styles of tags you wish to buy. There are three RFID button styles that cost $5.20 per set, and one RFID panel style that costs $6.50 per set. RFID button/junior panel back and large panel front/large panel back ($5.20/set) This is the style of tag that I tag my calves with, as they are the ideal size for Jerseys. The RFID button is 1-1/4 inches in diameter, while the junior back panel is 2-1/4 inches in length and 2 inches in width. The large front panel is 3 inches in length and 2 inches in width, while the large back panel is 2-3/4 inches in length and 2 inches in width. Ultraflex RFID button/junior panel back and large panel front/large panel back ($5.20/set) These tags are like the first option, but the back panels of both tags are a rounded triangular shape. They are made with a pliable plastic, and the stem of the male tag is thicker and shorter so that the tags are less likely to catch on feeders and twine. RFID button/junior panel back and extra large panel front/large panel back ($5.20/set) These tags are like the first option as well, but the large front panel is replaced with an extra large panel. These extra large panels are huge--4 inches in length and 3 inches in width--and Holstein Canada reports that Jersey breeders find that the extra large tags are so heavy that they rip out of their calves ears. RFID extra large panel front/large panel back and extra large panel front/large panel back ($6.50/set) The extra large front panels on both tags are 4 inches in length and 3 inches in width, and the large back panels are 3 inches in length and 3 inches in width. The RFID button is on one of the extra large panels. Again, this style is not recommended for Jerseys. Finally, would you like your new tags with or without herd numbers? There is no extra charge for herd numbers, so I purchased my tags with numbers and I'm really glad I did. I know my cows by name, but when my brother looks at the cows it's easier to ask him "What do you think about 108?" than "What do you think about Buttercup?" and try to describe what she looks like. If you want tags with herd numbers, you get to choose where your numbers start and are limited to five digits. I know many farmers who start with the number 1, but I wanted three digits on my tags. I started with the number 100 for my first cow, Blossom, and began counting from there for the calves born on the farm. So Daisy is 101, Aster is 102, Princess Sonja is 103, Shirley Rose is 104, Diana is 105, Grace is 106, Alexandra is 107, and Buttercup is 108. The next heifer calf born on the farm--you guessed it--will be given tags with the number 109. If you are tagging a calf every year or two, 30 tags will last you a lifetime. Skip buying the tags and find a dairy farmer or a farm that raises dairy cattle (like Birdsong Farm) who is willing to sell you tag sets as needed. Or you can tattoo your calf and register her first, and then order replacement tags for her.
Tag marker If you want tags without herd numbers, you can buy the tag marker for $5.00 and write the calf's name (and even her birthdate) on her tag instead. (If your tags are numbered with one or two digits, there may still be space for writing a name.)
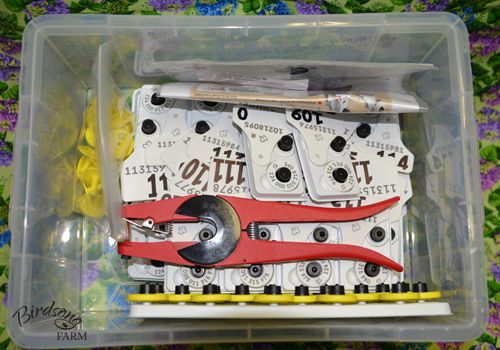
Tag pliers You will need to buy a red AllFlex Universal Total Tagger for $26.00. You will require a green pin for the Ultraflex tags, and a red pin for all the other tag styles. Soft cloth or paper towel You will want to clean your calf's ears before you start tagging. Paper towels are fine, but I like the microfiber dairy towels wet with plain water because they are so soft and remove 99% of bacteria, plus I can rewash them for the next calf. Antiseptic/disinfectant You will want to clean your calf's ears with an antiseptic before you tag, and will want to clean the tags with a disinfectant as well. Cotton balls or pads I pour a little antiseptic/disinfectant on cotton balls or pads to clean my calf's ears and the tags and kill any bacteria. If you wish, you can dip the tags in a jar of disinfectant instead. Storage box You can buy a fancy storage box for your tagging kit, but I purchased a clear 9 litre Really Useful Box from Staples instead. I store my tagging pliers and all my NLID and CCIA tags in the box. Best of all, I can stack my tattoo box on top of it and keep my tattooing and tagging kits in one place. 
These tags are the RFID button and the large front panel for the RFID/junior panel back and large panel front/large panel back tags. The tag on the left with one digit is a replacement tag for Gaymar Jester Fancier, and the tag on the right with three digits is waiting for the next heifer calf to be born.
This is the first post in a two-part series about how to tattoo your Jersey calf; please click here to read the second post.
0 Comments
Your comment will be posted after it is approved.
Leave a Reply. |
Categories
All
Archives
January 2020
|


