|
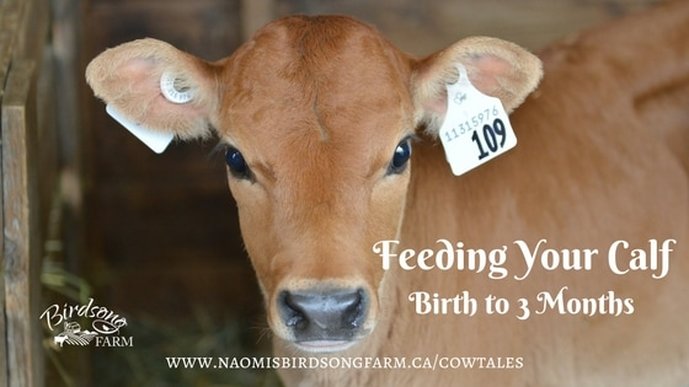
I'm doing research on the best calf feeding program for raising my Jersey heifers, and since I've received quite a few requests about the best way to raise calves I'm going to share my research with you in this month's CowTales post.
13 Comments
I began keeping milking records when my first cow, Blossom, started milking in September 2004. I milked her twice a day and would weigh her milk every morning and evening and record the weight on my paper chart.
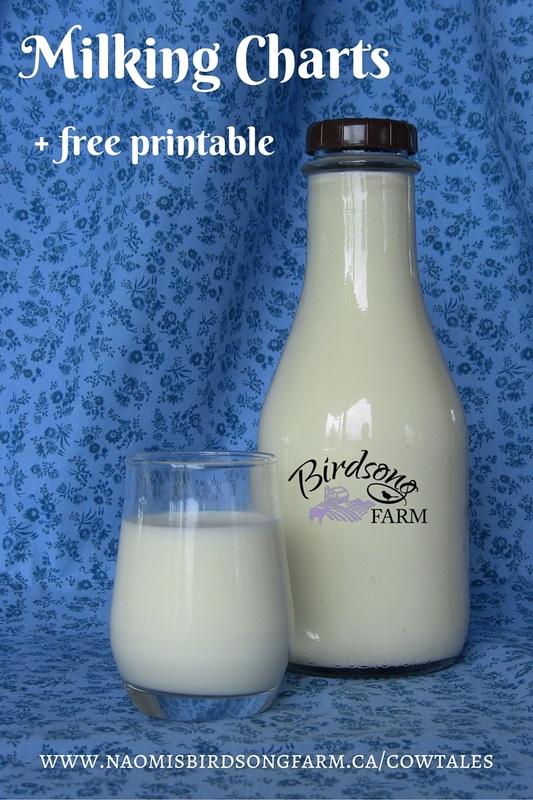
My paper charts worked well, but I needed to add the daily totals at the end of every day and then the monthly totals at the end of every month--all by hand. Shortly after I discovered Microsoft Excel I spent a weekend programming a new milking chart that did all the math for me. If you are milking a family cow--or a dozen on a small dairy--and want to keep daily milk records, I trust that my milking chart will be a handy resource for your farm.
This is the second post in a two-part series about registering your Jersey calf; please click here to read the first post about registering your calf with a paper application.
Today's post about registering your Jersey calf is the final post in a series that I am writing about tattooing, tagging, and registering your calf with Jersey Canada. In this post I describe how to register your calf with an online application, and this post is a sequel to May's post about how to register your calf with a paper application. Registering online takes minutes, and if you register your calf before three months of age you will receive an extra $1 off the registration fees. If you are new to registering, I recommend that you read Registering Your Jersey Calf, Part I before you begin to learn about registering your herd prefix and choosing a name for your calf.
Registering Your Calf
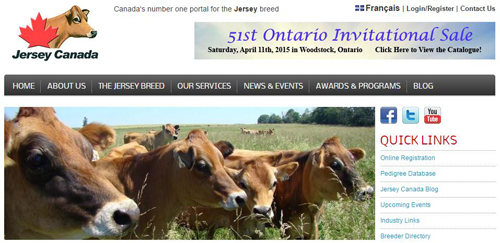
First of all, visit the Jersey Canada website at www.jerseycanada.com, and click on the 'Online Registration' tab, right below 'Quick Links' on the sidebar on the right side of the page. (You can find a link to the online registration page by clicking on 'Our Services' as well.
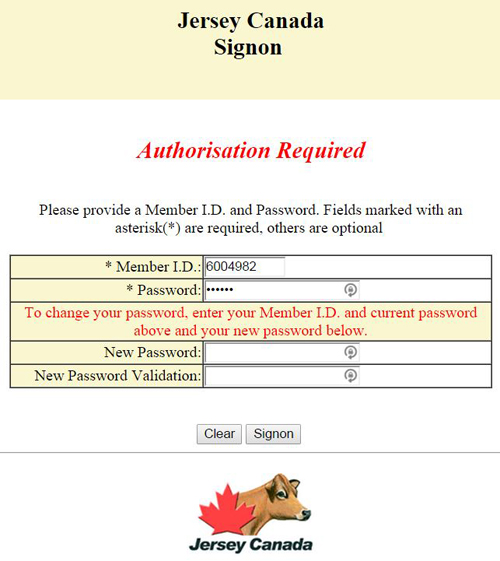
This brings you to the login page, where you are asked to enter your member number and password.
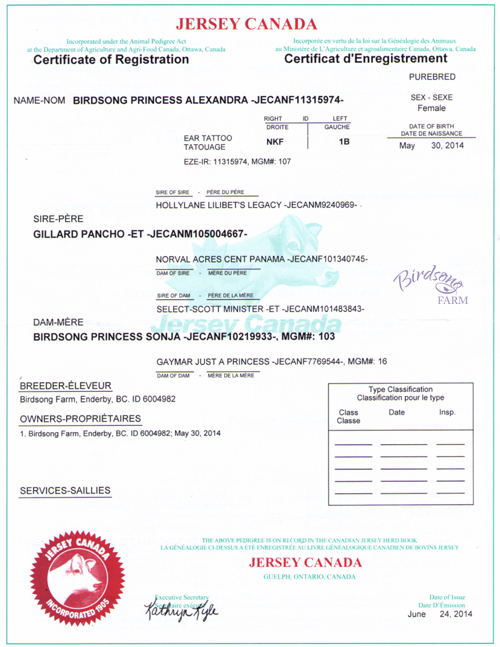
Your member number--that's the 7-digit number you can find after your name on your cow's registration papers--is your login name. If you've never registered online before, contact the Jersey Canada registrar at [email protected] or at 519-821-1020 to request a password.
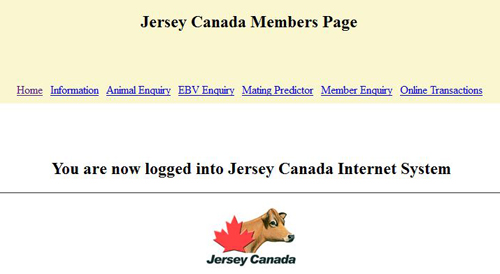
After you login in you will arrive at a member's page; click on 'Online Transactions' on the right-hand side.
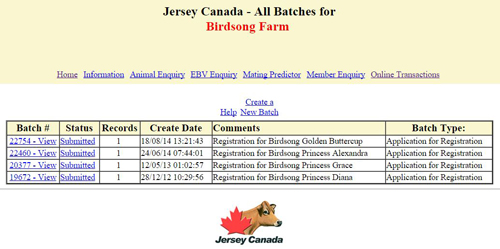
The next screen is the main batch page, which lists all the batches that you've submitted. As you can see from the image below, I'd already registered Birdsong Princess Diana, Birdsong Princess Grace, Birdsong Princess Alexandra, and Birdsong Golden Buttercup when this photo was taken.
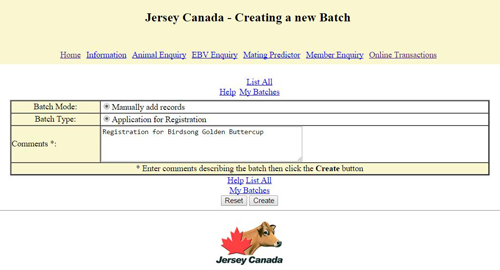
Click on 'Create a New Batch', which brings you to a screen where you are asked to add a comment. I always write who the registration is for, and as you can see below, I've typed "Registration for Birdsong Golden Buttercup".
You can register multiple calves in a batch, in which case you might want to list the names of all the calves that you are registering, or a comment like "Registrations for calves born between January 1, 2015 and February 28, 2015". When you are finished entering your comment, click 'Create'.
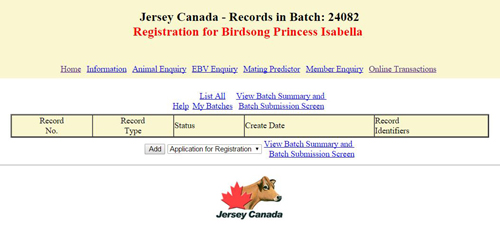
On the record creation screen click on the 'Add' button, right next to the box which says 'Application for Registration' and create a new registration application.
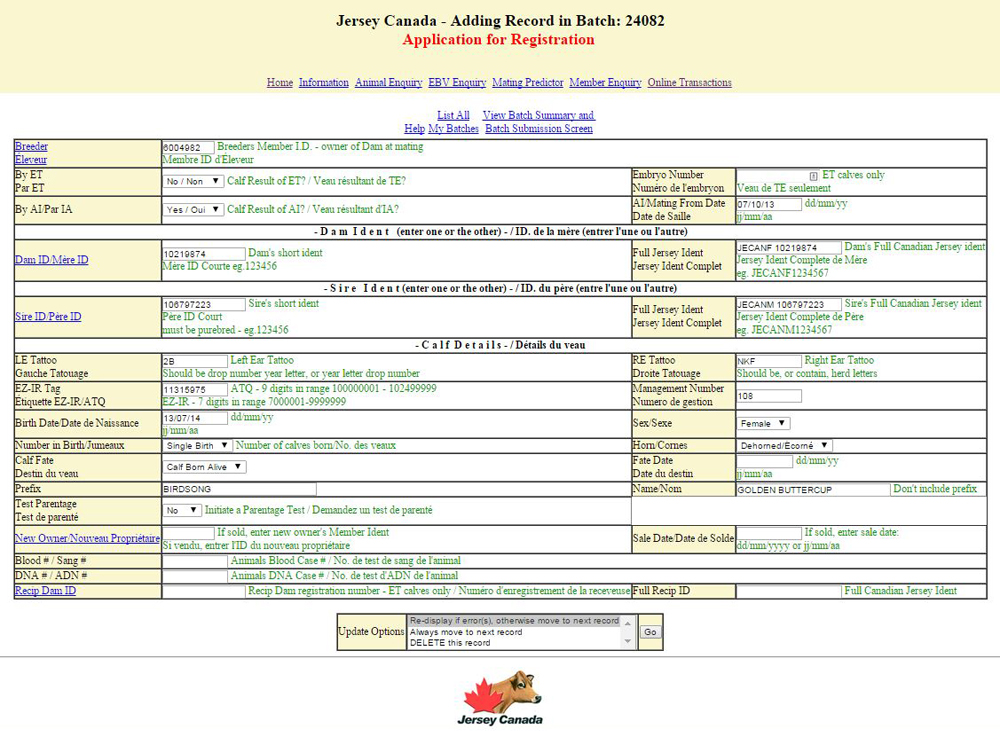
Now you can fill out the registration application, and I've filled out the one below as a guide:
~ Start by entering the breeder's member number. If you buy a bred cow and are registering the calf that was born, remember to enter the breeder's number instead of your number. ~ Was the calf the result of an embryo transfer (ET)? (yes/no) If yes, enter the embryo number. ~ Was the calf the result of artificial insemination (AI)? (yes/no) ~ Enter the breeding date. (dd/mm/yy) ~ Enter the dam's registration number. You can find these details on her registration papers. Enter her registration number in the first box, and then the prefix (for example, JECANF) followed by a space and then her registration number in the second box. ~ Enter the sire's registration number. You can find these details on the breeding slip. Enter his registration number in the first box, and the prefix (for example, JECANM or JEUSAM) followed by a space and then his registration number in the second box. ~ If the calf is tattooed, enter the left ear and right ear tattoos. ~ If the calf is tagged, enter the identification number and the herd management number. ~ Enter the calf's birth date. (dd/mm/yy) ~ What is the sex of the calf? (male/female) ~ How many calves were born? (single birth/twins/triplets) ~ Is the calf horned? (horned/scurred/polled/dehorned/unknown) ~ What is the calf's fate? (calf born alive/aborted/died at birth) If the calf was aborted or died at birth, enter the date of the event. (dd/mm/yy) ~ Enter your herd prefix, or the herd prefix of the breeder if you were not the breeder of this calf. ~ Enter the calf's name. Remember that you are limited to 30 characters, counting the herd prefix and spaces. ~ Would you like to test the calf for parentage? (yes/no) ~ If you've sold the calf, you can transfer her right now. Enter the new owner's membership number and the date of sale. (dd/mm/yy) ~ If the calf was the result of an embryo transfer, you will need to enter the recipient dam's registration number as well. When you are finished, double check everything that you've entered before clicking the 'Go' button. If you are registering multiple calves you can choose to begin a new record right away, but I always choose to re-display if there are errors.
Now you've arrived back at the record creation screen, where you can you can edit the record(s) in the batch, or if you are registering multiple calves you can click the 'Add' button again and create a new registration application.
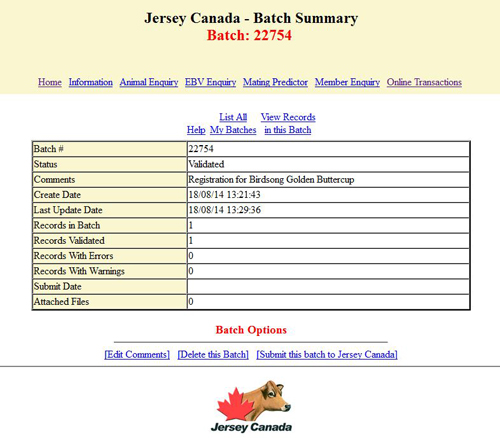
When you are finished entering and editing the registration application(s), click on the 'View Batch Summary and Batch Submission Screen'. On this screen you can review your batch. It gives you the status of your batch and tells you how many records there are, as well as how many of those records are validated and if there are any records with errors or warnings. If there are records with errors or warnings, click on 'View Records in this Batch' to return to the record creation screen and edit the records. When everything looks good, click 'Submit this batch to Jersey Canada'.
After you submit the batch, the status changes from 'Validated' to 'Sending'. (After Jersey Canada receives it the status will change to 'Submitted'.) You can exit the program at this point, or click on 'List All My Batches' to return to the main batch page.
Remember that the earlier you register your calf, the cheaper the registration fees are, and Jersey Canada members receive a discount on their fees as well.
Today's post about registering your Jersey calf is the fifth post in a three-part series that I am writing about tattooing, tagging, and registering your calf with Jersey Canada.
Register Your Herd Prefix
Before you start doing any registering, you are required to register your herd prefix with Jersey Canada for $5 plus tax. The name of every calf that you register will begin with the breeder's herd prefix. If you are the breeder of the calf, her name will begin with your prefix. For example, my herd prefix is Birdsong, so the names of all the calves that I breed and register start with Birdsong: Birdsong Shirley Rose, Birdsong Princess Alexandra, Birdsong Golden Buttercup. But if you buy a bred cow and register her calf, her name will start with the prefix of the previous owner. For example, I sold Birdsong Summer Blossom as a bred cow on July 23, 2012, and on October 19, 2012 she gave birth to a beautiful heifer calf. Blossom's new owners named the calf Copper Penny, and she was registered as Birdsong Copper Penny because I was her breeder. Often farmers will register their farm name (or part of their farm name) as their herd prefix. For example, my farm name is Birdsong Farm, and I registered my prefix as Birdsong; Neil and Melanie Hunter from Hometown Jerseys registered the prefix Hometown, and Walter and Tracy Howe from Mooshine Farms registered the prefix Mooshine. But a herd prefix is not limited to your farm name--I've found herd prefixes like Tazo (after the breeders, Taya and Zoey) and Milkmaid. You can choose any name you want for your herd prefix, if it's not registered by another Jersey breeder, or too close to another registered prefix (but I did find the prefixes Buttercup with a 'C' and Butterkup with a 'K'). When choosing your herd prefix, keep in mind that a calf's registered name is limited to 30 characters, and every space is counted as one character. I recommend keeping your herd prefix fairly short--10 or fewer characters--so that there is plenty of space left for your calf's name. For example, my herd prefix, Birdsong, is 8 characters, so there are 22 characters left for the calf's name. Name Your Calf Next you need to choose a name for your calf. The standard naming pattern for Jerseys is the breeder's herd prefix, followed by part of the sire's name, and finally the calf's name beginning with the letter for that cow family. Take my first purebred Jersey, Gaymar Just A Princess, as an example: her breeder is Gaymar Jerseys, her sire is Rapid Bay Just Wait, and she is from the 'P' cow family. Princess' dam is Gaymar Jester Palm (sire: Cloverholm C Top's Jester 99D), her granddam is Gaymar Knight Palmy (sire: Spruce Vine Surv Knight), and her great-granddam is Gaymar H G B Palmeda (sire: Hetherington Golden Babe). Mooshine Farms names their calves with the tattoo year letter. So all the calves born in 2015 will be given names that start with the letter 'C', and in 2016 all the names will start with the letter 'D'. I choose a theme for my cow families, and do not add part of the sire's name to the calf's name. For example, the cows in my "Blossom" family are named after flowers: Birdsong Summer Blossom, her daughters Birdsong Blossom's Daisy and Birdsong Autumn Aster, and her granddaughters Birdsong Shirley Rose, and Birdsong Golden Buttercup. The cows in my "Princess" family are named after royalty: Birdsong Princess Sonja (after Princess Sonja of Norway), Birdsong Princess Diana (after Princess Diana of Britain), Birdsong Princess Grace (after Princess Grace of Monaco), Birdsong Princess Alexandra (after Princess Alexandra of Britain), and Birdsong Princess Isabella (after Princess Isabella of Denmark). As you can see, there are several options when choosing a name for your calf, and while you are welcome to stick with the "tried and true", don't be afraid to get creative! Registering Your Calf Now that you've registered your herd prefix and decided on a name for your calf, it's time to fill out the registration application. Please click here to print off a registration application.
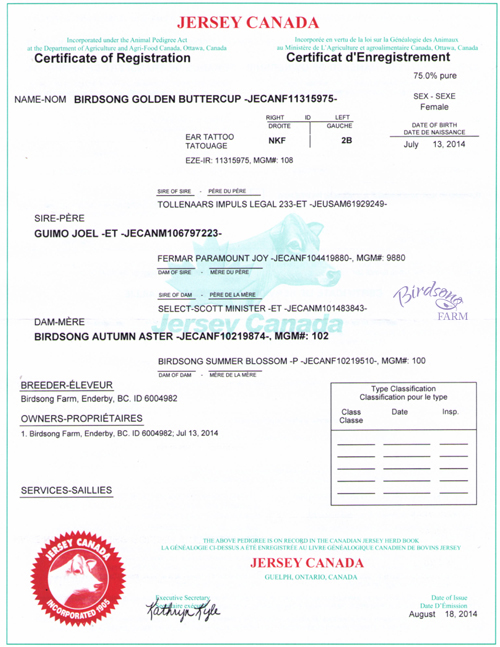
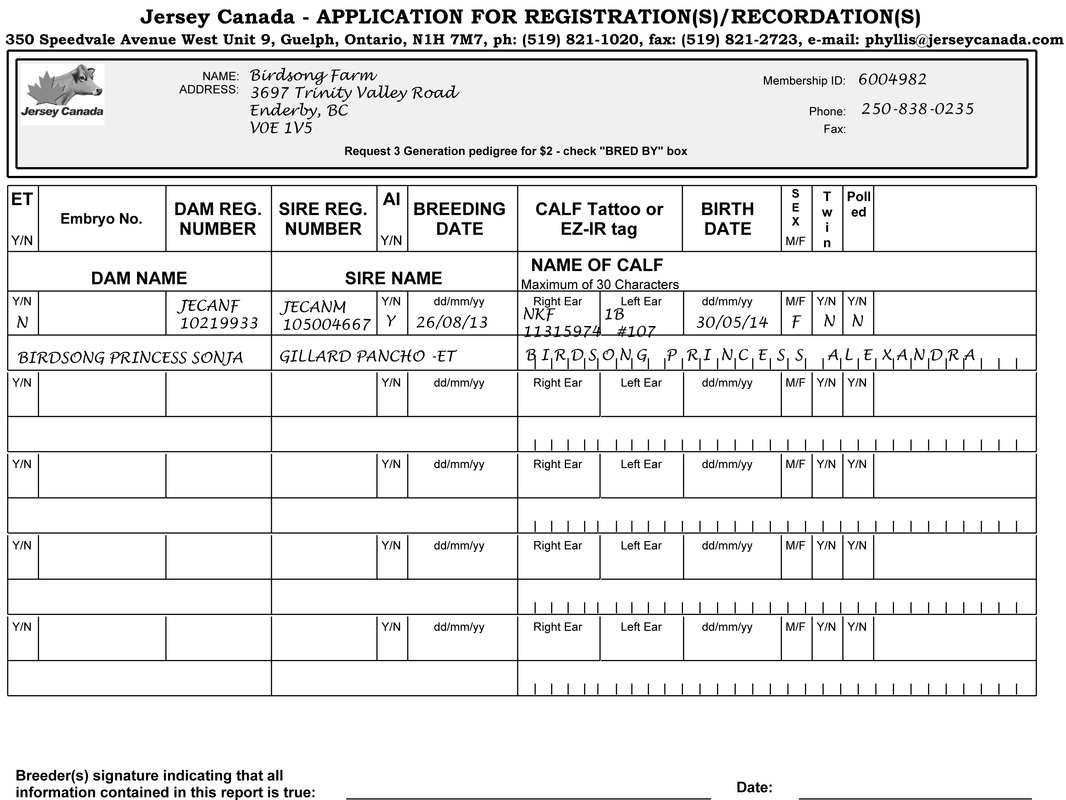
I've filled out the registration application above as a guide:
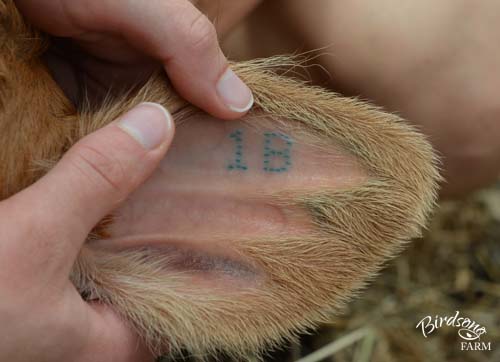
~ Start by filling out your name, address, and membership number. When I registered my herd prefix, I wanted my farm listed as the breeder; that is why I've filled in the name as Birdsong Farm instead of giving my name. Your membership number is the 7-digit number listed after your name on your cow's registration papers. ~ Is the calf the result of an embryo transplant (ET)? (yes/no) If yes, enter the embryo number. ~ Fill in the dam's name and her registration number. You can find these details on her registration papers. ~ Fill in the sire's name and his registration number. You can find these details on the breeding slip. ~ Is the calf the result of artificial insemination (AI)? (yes/no) ~ Enter the breeding date. (dd/mm/yy) ~ Jersey Canada requires you to tattoo or tag your calf before registering. If the calf is tattooed, enter the right ear and left ear tattoos; if the calf is tagged, enter the identification number followed by the herd management number. I choose to tattoo and tag all my calves, so I've entered the details for Alexandra's tattoos as well as her tags. ~ Enter the calf's birth date. (dd/mm/yy) ~ What is the sex of the calf? (male/female) ~ Was the calf a twin? (yes/no) ~ Is the calf polled? (yes/no) A polled calf never grows horns; a horned calf can be disbudded or dehorned and as a result will not grow horns, but is still registered as horned. ~ Enter the name of your calf, remembering to list her herd prefix first, followed by the name you've decided on for her. Remember that you are limited to 30 characters! Remember as well that if you buy a bred cow and are registering the calf that was born, your calf's name will begin with the breeder's prefix instead of your's. ~ If you are buying a bred cow and registering the calf that was born, enter the breeder's name and membership number in the blank box on the right-hand side. You will find the name and number on your cow's registration papers. ~ Review everything you've entered, and then sign and date the registration application. Mail the registration application to Jersey Canada (350 Speedvale Avenue West, Unit #9, Guelph, Ontario, N1H 7M7) with the required fees. The earlier you register your calf, the cheaper the fees are, and Jersey Canada members receive a discount on their registration fees as well.
This is the first post in a two-part series about how to register your Jersey calf; the second post, about how to register your calf online, will be published next month.
This is the second post in a two-part series about tattooing your Jersey calf; please click here to read the first post.
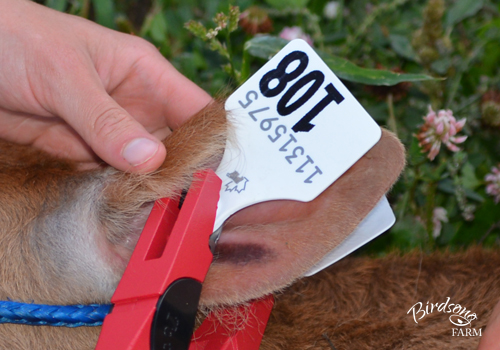
Prepare your tagging equipment Choose a tag set for your calf and record the identification number (the 8 or 9 digit number above the herd number) on the calf's registration application or in your farm records. When you register her, it will be her registration number as well. The identification number on your calf's tags are required to match her registration number, so if you are tagging a calf that was registered with tattoos (remember that Jersey Canada allows you to register a calf with tattoos or tags), phone Holstein Canada and order replacement tags for her that match her registration number. Remove the black insert from your tattoo pliers and store it in a safe place (like your tagging box). You will place the female tags beneath the metal clip on the tagging pliers, and the male tags on the pin. After placing the tags on the tagging pliers, remember to clean them with a cotton ball or pad wet with the disinfectant of your choice, or dip them in a small jar of disinfectant. 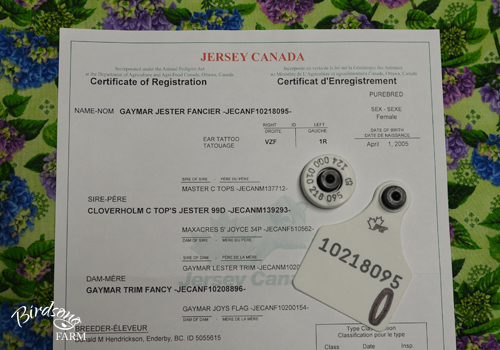
These are replacement tags for Gaymar Jester Fancier. She lost one of her tags and the other one is broken, so I ordered replacement tags for her. As you can see, the tag identification number matches her registration number. Tags that are lost from everyday wear and tear are replaced free of charge.
Prepare your calf
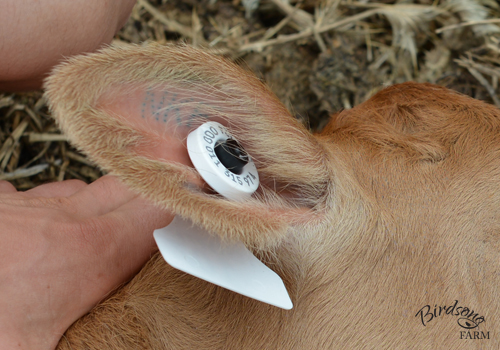
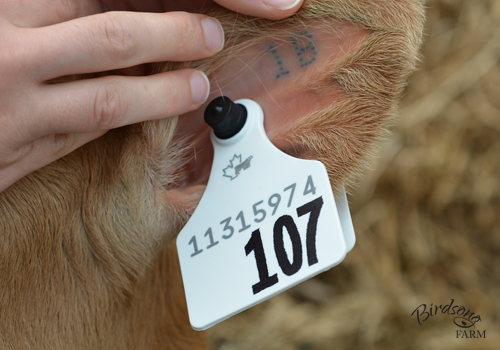
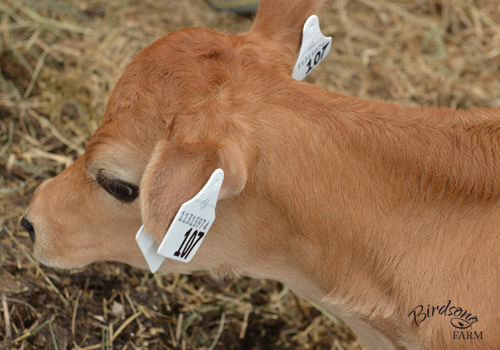
I find that tagging, like tattooing, takes at least two people (one to restrain the calf and one to tag), so I always ask one of my brothers or sisters to give me a hand. If no siblings are handy when you tag, I recommend that you ask a friend or neighbour to assist you. After your calf is restrained, you will want to clean the inside of her ears with a soft cloth or paper towel wet with plain water, and then with a cotton ball or pad wet with the antiseptic of your choice. If you tattooed your calf, double check her tattoos after you clean away the dirt and dried tattoo ink. Tag! The RFID button/junior panel back tag is placed in the right ear with the herd tattoo letters, and the large panel front/large panel back tag is placed in the left ear with the animal number and year letter. Remember that the calf's ears are reversed when you are facing her (her right ear is on your left and vice versa). The tags are placed between the two ribs in the calf's ear, below the tattoo. If you tattooed your calf between the two ribs instead of above the top rib, be careful that you do not damage the tattoo when tagging your calf. Divide the calf's ear in thirds; you want to place the tag in the first third of the ear closest to her head, where the ear is thicker for a tighter fit. Always place the female tags in the ear, where the curl of the ear keeps the RFID button and the black caps on the female tags from catching on things and ripping the tags out.
I always tag the right ear first, with the RFID button/junior panel back tags. Ask your assistant to keep the calf from squirming while you squeeze the pliers, and when they are in place count to three...one...two...three...and squeeze on three. Squeeze the pliers firmly so that the two tags lock (there will be a little 'click'), but not so tightly that the tags are damaged or pinch the calf's ear. After the tags are locked, release the pliers and slide the metal clip off the female tag.
Next, I tag the left ear with the large panel front/large panel back tags. The left ear is harder as the tags are larger, and I find it works best if the female tag is on a 45 to 90 degree angle to the pliers.
When you are finished tagging, double check that the right tags are in the right ears and are locked but not too tight.
Congratulations! You've finished tagging your first calf! You'll find that tagging, like tattooing, gets easier every time. |
Categories
All
Archives
January 2020
|
