|
This is the second post in a two-part series about tattooing your Jersey calf; please click here to read the first post.
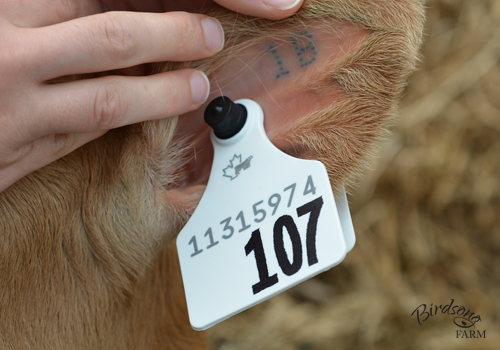
Prepare your tagging equipment Choose a tag set for your calf and record the identification number (the 8 or 9 digit number above the herd number) on the calf's registration application or in your farm records. When you register her, it will be her registration number as well. The identification number on your calf's tags are required to match her registration number, so if you are tagging a calf that was registered with tattoos (remember that Jersey Canada allows you to register a calf with tattoos or tags), phone Holstein Canada and order replacement tags for her that match her registration number. Remove the black insert from your tattoo pliers and store it in a safe place (like your tagging box). You will place the female tags beneath the metal clip on the tagging pliers, and the male tags on the pin. After placing the tags on the tagging pliers, remember to clean them with a cotton ball or pad wet with the disinfectant of your choice, or dip them in a small jar of disinfectant. 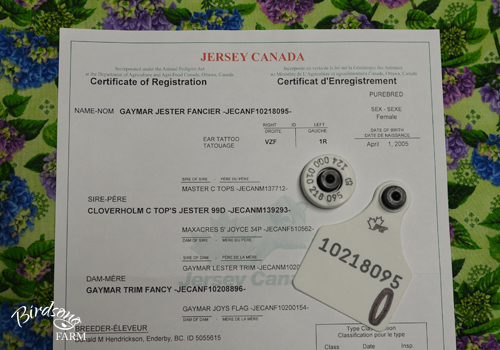
These are replacement tags for Gaymar Jester Fancier. She lost one of her tags and the other one is broken, so I ordered replacement tags for her. As you can see, the tag identification number matches her registration number. Tags that are lost from everyday wear and tear are replaced free of charge.
Prepare your calf
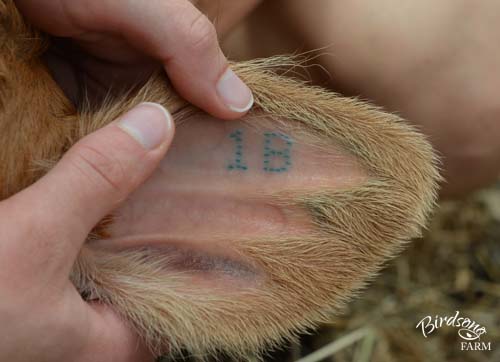
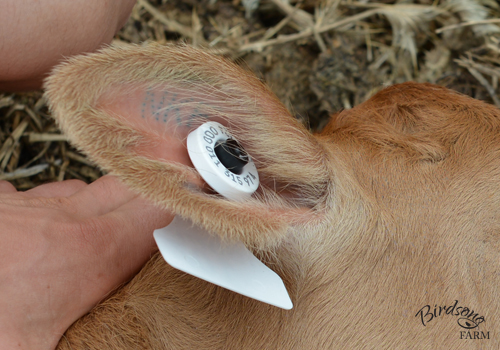
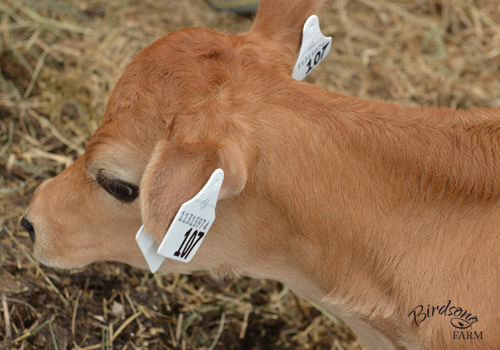
I find that tagging, like tattooing, takes at least two people (one to restrain the calf and one to tag), so I always ask one of my brothers or sisters to give me a hand. If no siblings are handy when you tag, I recommend that you ask a friend or neighbour to assist you. After your calf is restrained, you will want to clean the inside of her ears with a soft cloth or paper towel wet with plain water, and then with a cotton ball or pad wet with the antiseptic of your choice. If you tattooed your calf, double check her tattoos after you clean away the dirt and dried tattoo ink. Tag! The RFID button/junior panel back tag is placed in the right ear with the herd tattoo letters, and the large panel front/large panel back tag is placed in the left ear with the animal number and year letter. Remember that the calf's ears are reversed when you are facing her (her right ear is on your left and vice versa). The tags are placed between the two ribs in the calf's ear, below the tattoo. If you tattooed your calf between the two ribs instead of above the top rib, be careful that you do not damage the tattoo when tagging your calf. Divide the calf's ear in thirds; you want to place the tag in the first third of the ear closest to her head, where the ear is thicker for a tighter fit. Always place the female tags in the ear, where the curl of the ear keeps the RFID button and the black caps on the female tags from catching on things and ripping the tags out.
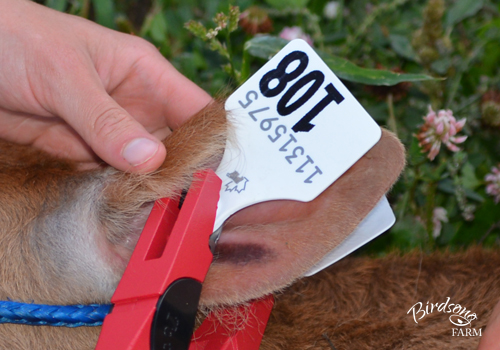
I always tag the right ear first, with the RFID button/junior panel back tags. Ask your assistant to keep the calf from squirming while you squeeze the pliers, and when they are in place count to three...one...two...three...and squeeze on three. Squeeze the pliers firmly so that the two tags lock (there will be a little 'click'), but not so tightly that the tags are damaged or pinch the calf's ear. After the tags are locked, release the pliers and slide the metal clip off the female tag.
Next, I tag the left ear with the large panel front/large panel back tags. The left ear is harder as the tags are larger, and I find it works best if the female tag is on a 45 to 90 degree angle to the pliers.
When you are finished tagging, double check that the right tags are in the right ears and are locked but not too tight.
Congratulations! You've finished tagging your first calf! You'll find that tagging, like tattooing, gets easier every time.
0 Comments
|
Categories
All
Archives
January 2020
|
