Did you know that Jersey pregnancies are five days shorter than the average cow? That's right! The average cow is pregnant for 283 days, but the average Jersey cow is pregnant for 278 days.
"The normal gestation period of the dairy cow is 283 days. Based on studies made by the Ohio Experiment Station, however, it is evident that there is variation among breeds. The following figures show the gestation period by breed, as found in this experiment: Ayshire, 278 days; Brown Swiss, 288 days; Guernsey, 283 days; Holstein, 279 days; and Jersey, 278 days. The Ohio station also reported (1) that the gestation period of first-calf heifers is about 2 days less than that of older cows of the respective breeds, and (2) that the gestation period where bull calves are born is about 1 day longer than where females are born." ~M.E. Ensminger, Dairy Cattle Science
20 Comments
This is the second post in a two-part series about tattooing your Jersey calf; please click here to read the first post.
Prepare your tagging equipment Choose a tag set for your calf and record the identification number (the 8 or 9 digit number above the herd number) on the calf's registration application or in your farm records. When you register her, it will be her registration number as well. The identification number on your calf's tags are required to match her registration number, so if you are tagging a calf that was registered with tattoos (remember that Jersey Canada allows you to register a calf with tattoos or tags), phone Holstein Canada and order replacement tags for her that match her registration number. Remove the black insert from your tattoo pliers and store it in a safe place (like your tagging box). You will place the female tags beneath the metal clip on the tagging pliers, and the male tags on the pin. After placing the tags on the tagging pliers, remember to clean them with a cotton ball or pad wet with the disinfectant of your choice, or dip them in a small jar of disinfectant. 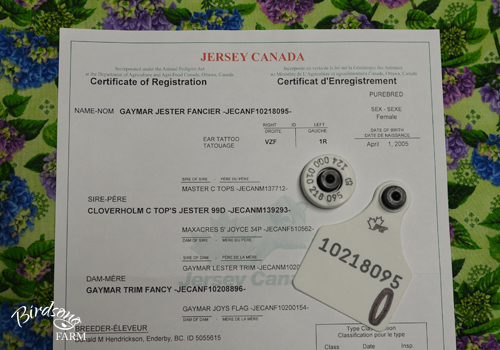
These are replacement tags for Gaymar Jester Fancier. She lost one of her tags and the other one is broken, so I ordered replacement tags for her. As you can see, the tag identification number matches her registration number. Tags that are lost from everyday wear and tear are replaced free of charge.
Prepare your calf
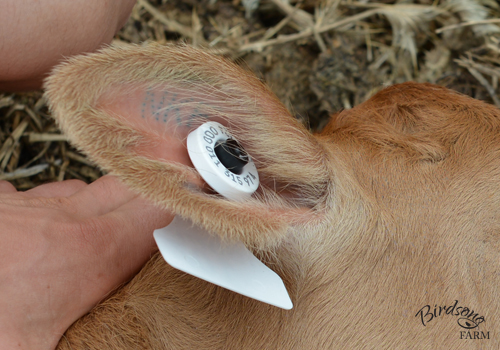
I find that tagging, like tattooing, takes at least two people (one to restrain the calf and one to tag), so I always ask one of my brothers or sisters to give me a hand. If no siblings are handy when you tag, I recommend that you ask a friend or neighbour to assist you. After your calf is restrained, you will want to clean the inside of her ears with a soft cloth or paper towel wet with plain water, and then with a cotton ball or pad wet with the antiseptic of your choice. If you tattooed your calf, double check her tattoos after you clean away the dirt and dried tattoo ink. Tag! The RFID button/junior panel back tag is placed in the right ear with the herd tattoo letters, and the large panel front/large panel back tag is placed in the left ear with the animal number and year letter. Remember that the calf's ears are reversed when you are facing her (her right ear is on your left and vice versa). The tags are placed between the two ribs in the calf's ear, below the tattoo. If you tattooed your calf between the two ribs instead of above the top rib, be careful that you do not damage the tattoo when tagging your calf. Divide the calf's ear in thirds; you want to place the tag in the first third of the ear closest to her head, where the ear is thicker for a tighter fit. Always place the female tags in the ear, where the curl of the ear keeps the RFID button and the black caps on the female tags from catching on things and ripping the tags out. 
The tags are placed between the two ribs, and in the first third of the ear from the calf's head. That's right below the knuckle on my thumb.
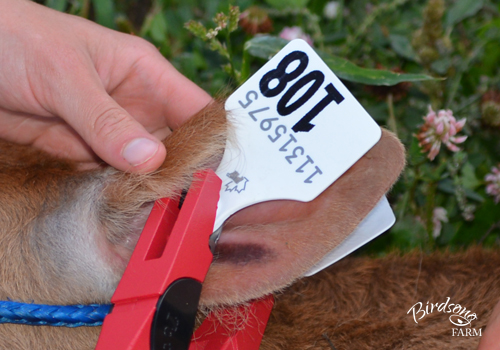
I always tag the right ear first, with the RFID button/junior panel back tags. Ask your assistant to keep the calf from squirming while you squeeze the pliers, and when they are in place count to three...one...two...three...and squeeze on three. Squeeze the pliers firmly so that the two tags lock (there will be a little 'click'), but not so tightly that the tags are damaged or pinch the calf's ear. After the tags are locked, release the pliers and slide the metal clip off the female tag.
Next, I tag the left ear with the large panel front/large panel back tags. The left ear is harder as the tags are larger, and I find it works best if the female tag is on a 45 to 90 degree angle to the pliers.
When you are finished tagging, double check that the right tags are in the right ears and are locked but not too tight.
Congratulations! You've finished tagging your first calf! You'll find that tagging, like tattooing, gets easier every time. 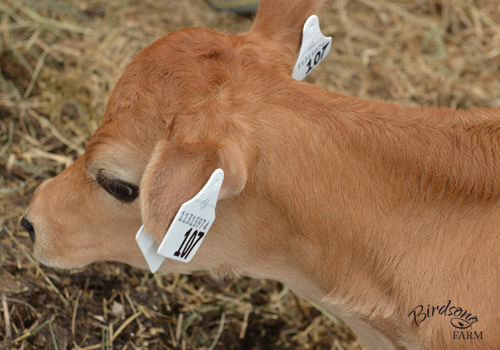
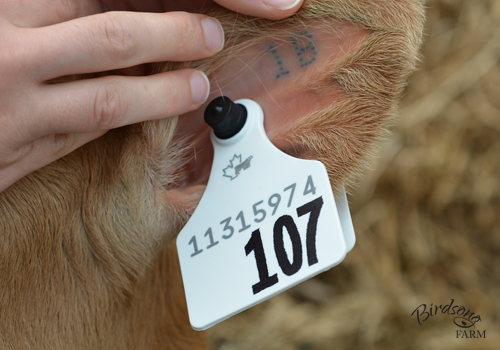
Tagging completed! These are Alexandra's new "earrings", viewed from the back.

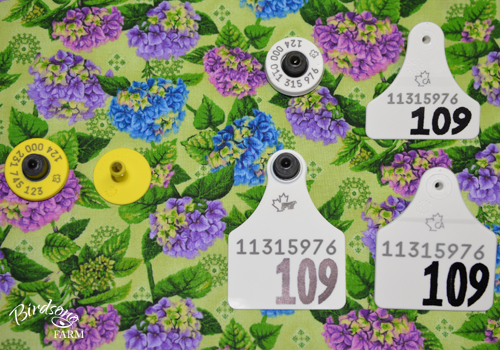
The yellow CCIA tags for beef cattle (or dairy cattle being raised for beef) are on the left, and the white NLID tags for dairy cattle are on the right.
Today's post about tagging your Jersey calf is the third post in a series that I am writing about tattooing, tagging, and registering your calf with Jersey Canada.
You are required to tattoo or tag your calf before registering her with Jersey Canada. I tattoo and tag, but both are not required and many dairy farmers choose to tag but not tattoo. I choose to tattoo because tags can get lost, plus it's a lot harder to tamper with a tattoo than with a tag. I tag my calves because in Canada you are required to tag all cattle before they leave the farm where they were born, which is known as the farm of origin. I tag my calves about two weeks after tattooing, when they are about a month old. There are two types of tags for cattle: the yellow CCIA (Canadian Cattle Identification Agency) tags which are reserved for tagging beef cattle, and the white NLID (National Livestock Identification for Dairy) tags which are reserved for tagging dairy cattle. The breeds that you tag with the white NLID tags are the Ayshire, Brown Swiss, Canadienne, Guernsey, Holstein, Jersey, Milking Shorthorn, and Norwegian Red breeds; dairy calves that are being raised for beef can be tagged with the white NLID tags, or the yellow CCIA tags. 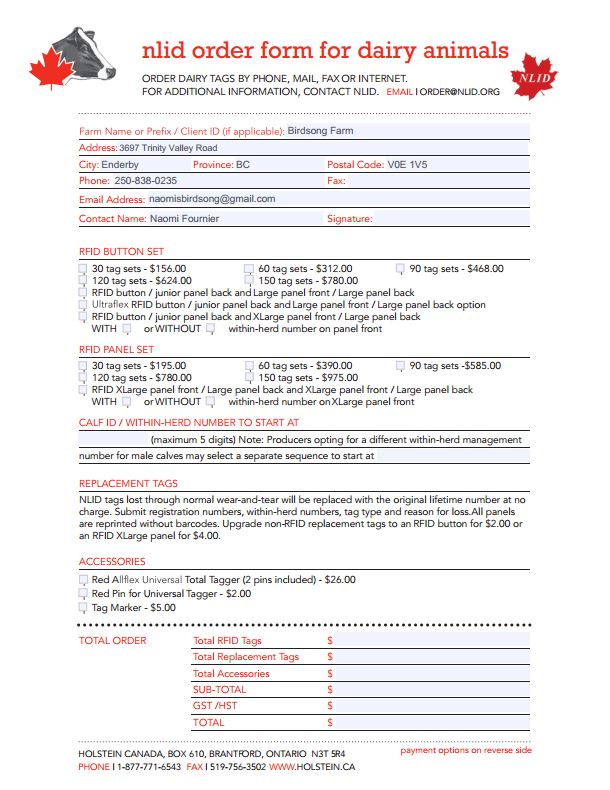
Purchase your tagging kit
Before you tag, you will want to order your tagging pliers and a package of NLID tags. Holstein Canada administers the NLID program, and you can order everything you require by clicking here. Start out by filling out the order form with your farm name or prefix (my farm name is Birdsong Farm; my prefix, which I've registered with Jersey Canada, is Birdsong), or with your client identification if you've created an account with Holstein Canada.
Tags First, choose how many tag sets you wish to buy: 30, 60, 90, 120, or 150 tag sets. I purchased a 30 tag set in 2011, and I've tagged six calves in the past three years. I'm guessing that the remaining 24 tags will keeping me going for another twelve years!
Next, choose which of the four styles of tags you wish to buy. There are three RFID button styles that cost $5.20 per set, and one RFID panel style that costs $6.50 per set. RFID button/junior panel back and large panel front/large panel back ($5.20/set) This is the style of tag that I tag my calves with, as they are the ideal size for Jerseys. The RFID button is 1-1/4 inches in diameter, while the junior back panel is 2-1/4 inches in length and 2 inches in width. The large front panel is 3 inches in length and 2 inches in width, while the large back panel is 2-3/4 inches in length and 2 inches in width. Ultraflex RFID button/junior panel back and large panel front/large panel back ($5.20/set) These tags are like the first option, but the back panels of both tags are a rounded triangular shape. They are made with a pliable plastic, and the stem of the male tag is thicker and shorter so that the tags are less likely to catch on feeders and twine. RFID button/junior panel back and extra large panel front/large panel back ($5.20/set) These tags are like the first option as well, but the large front panel is replaced with an extra large panel. These extra large panels are huge--4 inches in length and 3 inches in width--and Holstein Canada reports that Jersey breeders find that the extra large tags are so heavy that they rip out of their calves ears. RFID extra large panel front/large panel back and extra large panel front/large panel back ($6.50/set) The extra large front panels on both tags are 4 inches in length and 3 inches in width, and the large back panels are 3 inches in length and 3 inches in width. The RFID button is on one of the extra large panels. Again, this style is not recommended for Jerseys. Finally, would you like your new tags with or without herd numbers? There is no extra charge for herd numbers, so I purchased my tags with numbers and I'm really glad I did. I know my cows by name, but when my brother looks at the cows it's easier to ask him "What do you think about 108?" than "What do you think about Buttercup?" and try to describe what she looks like. If you want tags with herd numbers, you get to choose where your numbers start and are limited to five digits. I know many farmers who start with the number 1, but I wanted three digits on my tags. I started with the number 100 for my first cow, Blossom, and began counting from there for the calves born on the farm. So Daisy is 101, Aster is 102, Princess Sonja is 103, Shirley Rose is 104, Diana is 105, Grace is 106, Alexandra is 107, and Buttercup is 108. The next heifer calf born on the farm--you guessed it--will be given tags with the number 109. If you are tagging a calf every year or two, 30 tags will last you a lifetime. Skip buying the tags and find a dairy farmer or a farm that raises dairy cattle (like Birdsong Farm) who is willing to sell you tag sets as needed. Or you can tattoo your calf and register her first, and then order replacement tags for her. 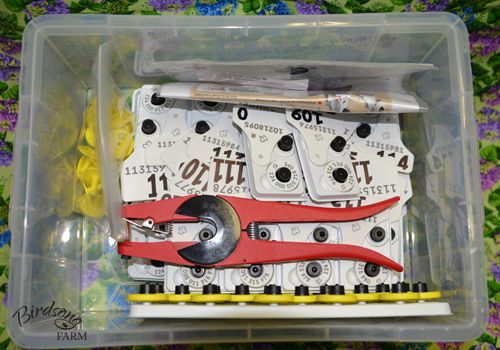
This is my tagging kit, with my tagging pliers and all my NLID and CCIA tags.
Tag marker If you want tags without herd numbers, you can buy the tag marker for $5.00 and write the calf's name (and even her birthdate) on her tag instead. (If your tags are numbered with one or two digits, there may still be space for writing a name.)
Tag pliers You will need to buy a red AllFlex Universal Total Tagger for $26.00. You will require a green pin for the Ultraflex tags, and a red pin for all the other tag styles. Soft cloth or paper towel You will want to clean your calf's ears before you start tagging. Paper towels are fine, but I like the microfiber dairy towels wet with plain water because they are so soft and remove 99% of bacteria, plus I can rewash them for the next calf. Antiseptic/disinfectant You will want to clean your calf's ears with an antiseptic before you tag, and will want to clean the tags with a disinfectant as well. Cotton balls or pads I pour a little antiseptic/disinfectant on cotton balls or pads to clean my calf's ears and the tags and kill any bacteria. If you wish, you can dip the tags in a jar of disinfectant instead. Storage box You can buy a fancy storage box for your tagging kit, but I purchased a clear 9 litre Really Useful Box from Staples instead. I store my tagging pliers and all my NLID and CCIA tags in the box. Best of all, I can stack my tattoo box on top of it and keep my tattooing and tagging kits in one place. 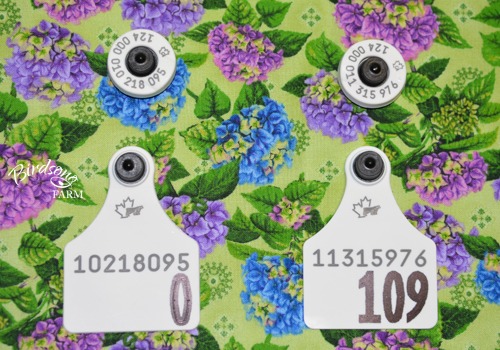
These tags are the RFID button and the large front panel for the RFID/junior panel back and large panel front/large panel back tags. The tag on the left with one digit is a replacement tag for Gaymar Jester Fancier, and the tag on the right with three digits is waiting for the next heifer calf to be born.
This is the first post in a two-part series about how to tattoo your Jersey calf; please click here to read the second post.
Birdsong Blossom's Daisy was one of my best friends. She was the first heifer calf born on the farm, and I was thrilled when she was born because Blossom's first three calves were all males! When Daisy was born I never dreamed that I would be selling her one day, but after spending seven years on the farm and blessing me with two beautiful heifers, it was time to say goodbye.
Selling a cow is always bittersweet... I'm happy that my little herd has grown to the point where I can sell one of my beloved Jerseys, but it's always hard to say goodbye to a good friend.
Daisy's new farm is really nice and she is blessing her new family with her rich Jersey milk and cream; knowing that made parting with her a little easier. But even after two months there are still times when the farm feels a little empty without her greeting me when I start my morning chores.
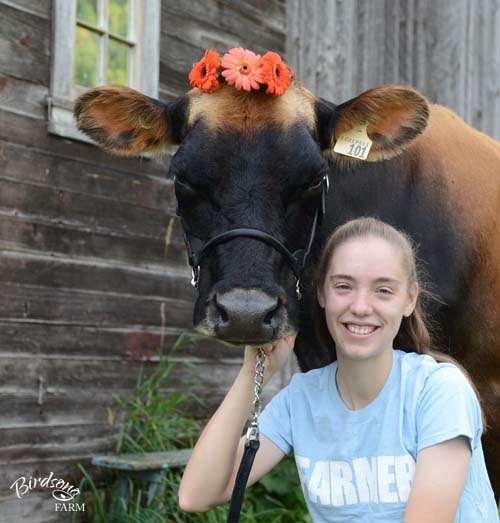
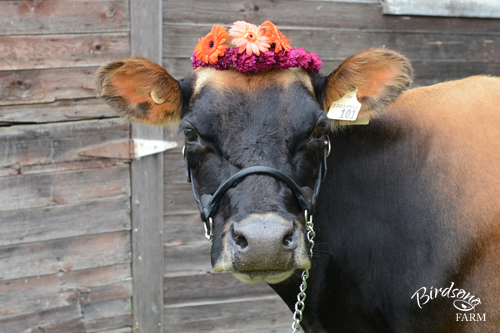
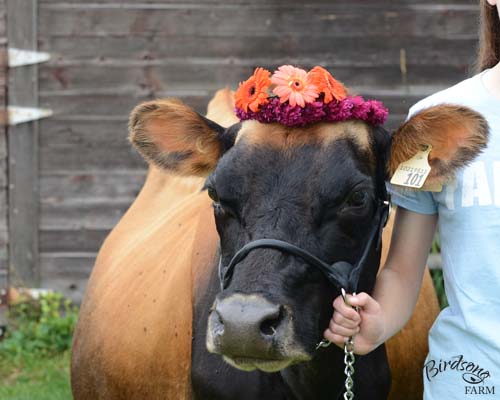
Since Daisy is part of my "Blossom" cow family, where all the heifer calves are named after flowers, I thought it would be nice to photograph Daisy with her namesake flower: daisies.
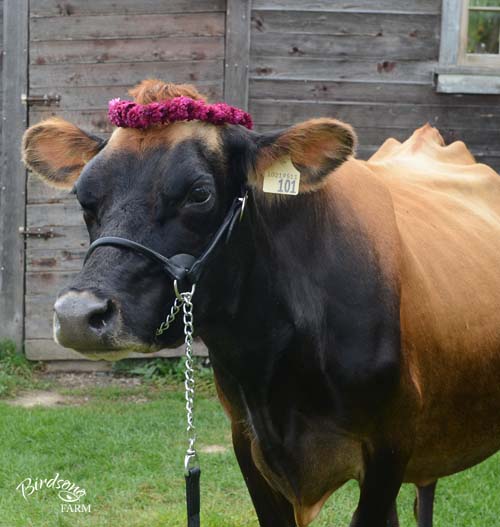
The talented Janice Robillard from Crocus Floral Design in Enderby made two beautiful daisy wreaths for her, and my sister Anna photographed her in front of our neighbour's old wooden barn. The weathered barn boards made a great background! 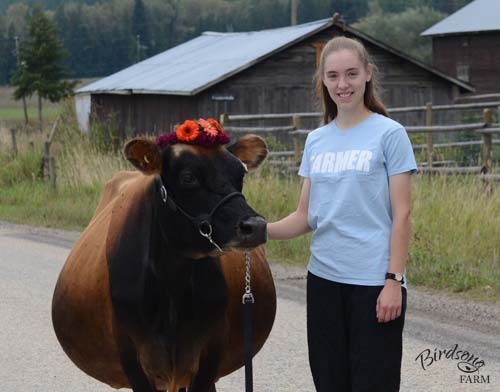
I will always cherish my memories of my time with Daisy, and I know that her new family at Crooked Sky Farm in Nakusp will be making many new memories with her!
This is the second post in a two-part series about tattooing your Jersey calf; please click here to read the first post.
I've found that tattooing takes at least two people (one to restrain the calf and one to tattoo), so I always ask one of my brothers or sisters to give me a hand. A younger sibling often tags along as well and hands me my pliers, ink, et cetera as I ask for them. If no brothers are handy when you tattoo, I recommend that you ask a friend or neighbour to assist you. Prepare your calf The first step is restraining your calf. I'm always amazed at how strong a two-week-old heifer is, so strong brothers are very handy. 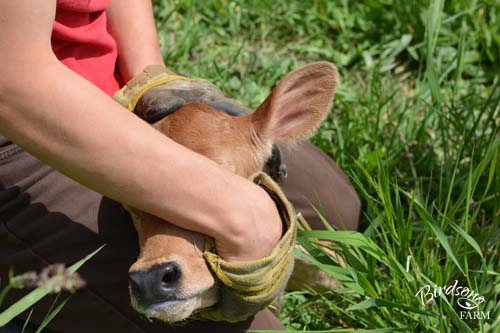
Alexandra is restrained and ready for tattooing.
After your calf is restrained, you will want to clean the inside of her ears with a soft cloth or paper towel wet with plain water, and then with a cotton ball or pad wet with the antiseptic of your choice. Calf ears are often quite waxy (that's a good thing—waxy ears are a sign of high butterfat milk in her future), so it might take a bit of work to get them squeaky clean.
Tattoo! Your herd tattoo letters go in your calf's right ear, and the animal number and year letter go in your calf's left ear. Remember that the calf's ears are reversed when you are facing her (her right ear is on your left and vice versa). Traditionally, the tattoos were placed between the two ribs in the calf's ear, but now that Canadian farmers are required to tag dairy cattle before they leave their farm of birth many farmers place the tattoos above the top rib and reserve the space between the two ribs for the tags. I place all my tattoos above the top rib; this way the tattoo isn't in the way when I tag the calf at a later date, and if the tags ever rip out the tattoo is not damaged. 
Alexandra's ear before washing. You can clearly see the two ribs in this photo; the tattoo will be placed between the top rib and the top of her ear.
Most farmers will apply the ink to the ear before tattooing; I always tattoo first and then double check the letters and readability of the tattoo before I apply the ink. This way if I make a mistake while I'm tattooing, it's easy to fix—I skip the ink and retattoo in a couple weeks.
When your calf's ears are dry, double check your tattoo digits and position your tattoo pliers, remembering to watch out for the big blood veins (if you hit one of the big veins the blood can damage your tattoo; the small veins are fine). When the tattoo pliers are in position, I gently squeeze them so that the positive ear release is touching the ear, but the tattoo needles are not. Ask your assistant to keep the calf from squirming while you squeeze the pliers, and then count to three...one...two...three...and squeeze on three. Squeeze the pliers firmly (you'll feel a little "crunch") for a deep, clear tattoo. The positive ear release on the Stone tattoo pliers releases the ear from the tattoo needles and keeps the tattoo crisp and clear with no scratches. 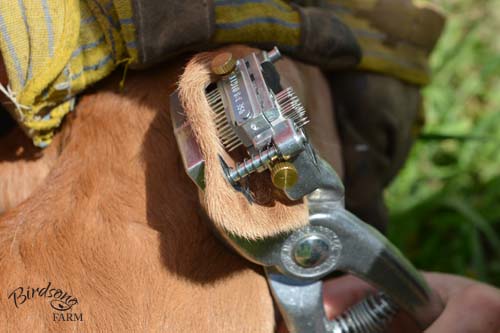
All set and ready to squeeze in one...two...three!
Check your handiwork, and if everything looks good apply ink to the tattoo. I rub the ink in with my thumb and a soft toothbrush that I've reserved for tattooing and keep with my tattoo kit. You may want to apply ink two or three times to get good coverage—you want to make a tattoo that lasts the lifetime of the cow. Leave the extra ink on; it will dry out and flake off.

Checking the tattoo...

...and applying the ink.
When you are finished, repeat on the other ear, remembering to change your tattoo digits. I always tattoo the right ear with my herd letters first, and then tattoo the left ear with the animal number and year letter.
Congratulations! You've finished tattooing your first calf! You'll find that tattooing gets easier every time—it took me two and a half calves (five ears) to stop cringing with the "crunch". 
Alexandra's completed tattoo two weeks later.
|